Title: Modeling bathroom furniture
Author: Groza Danut
Posted: 12/30/2012
Software: Blender 2.65
Level: Beginner
Hi! Before I start this written tutorial I want to ask you to leave a comment bellow after you read it and say if you liked it or not, what you think about it and if you have some advices for me.
Ok, let's get started. In this tutorial I will explain every step and I will add images to solve confusions. The item that we are going to model is some kind of bathroom furniture with a sink in it that is put on the wall or on the floor:
Every step is explained but before making this tutorial you should know how to:
- manipulate objects
- switch from object mode into edit mode
- switch from solid shading to wireframe shading
- extrude and add loop cuts
In this tutorial you will learn:
- how to separate objects
- how to transform a plane into a circle ("To sphere")
- how to model a simple sink
- how to model a tap
- how to add subdivision surface modifier to make the item look more realistic
- how to make the subdivided object look good using loop cuts
Modeling the furniture body
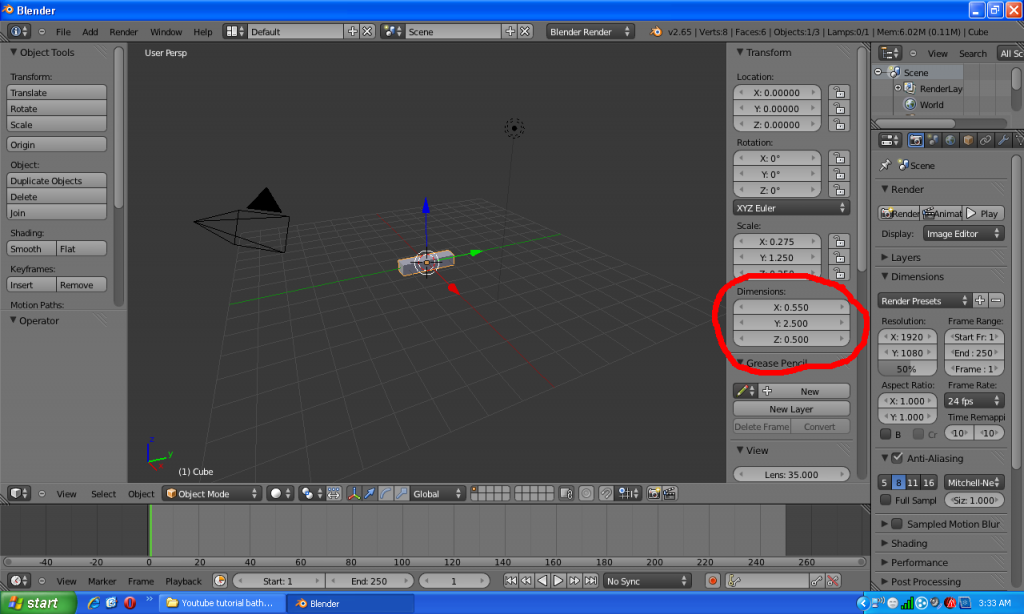
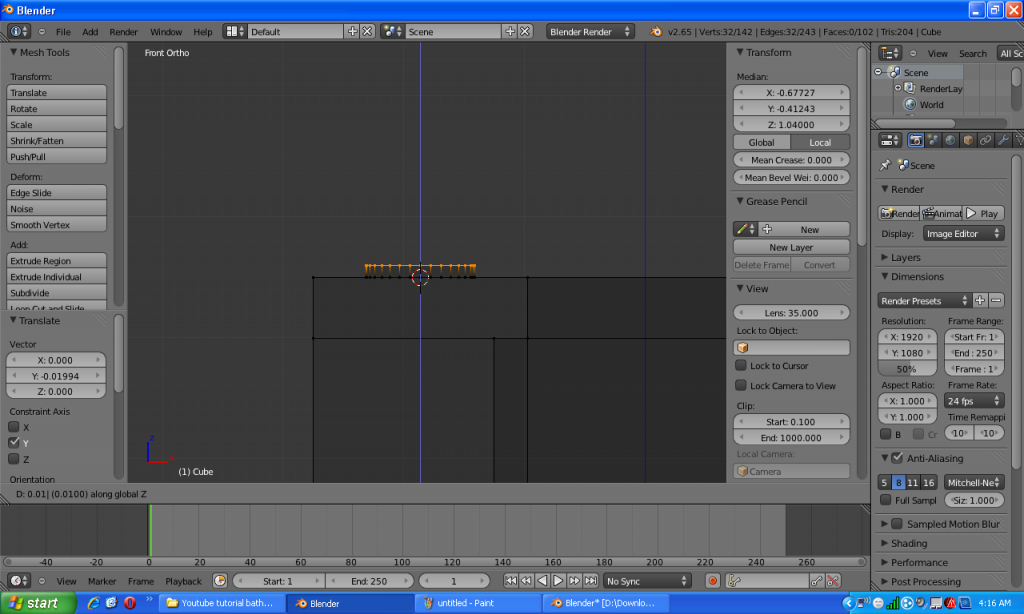
We will start with the default blender scene and we will insert the dimensions for the cube. Note: insert the values at the dimensions not scale. Select the cube and press N to open the right panel and insert 0.55 on X axes, 2.5 on Y and 0.5 on Z.(default measuring units)
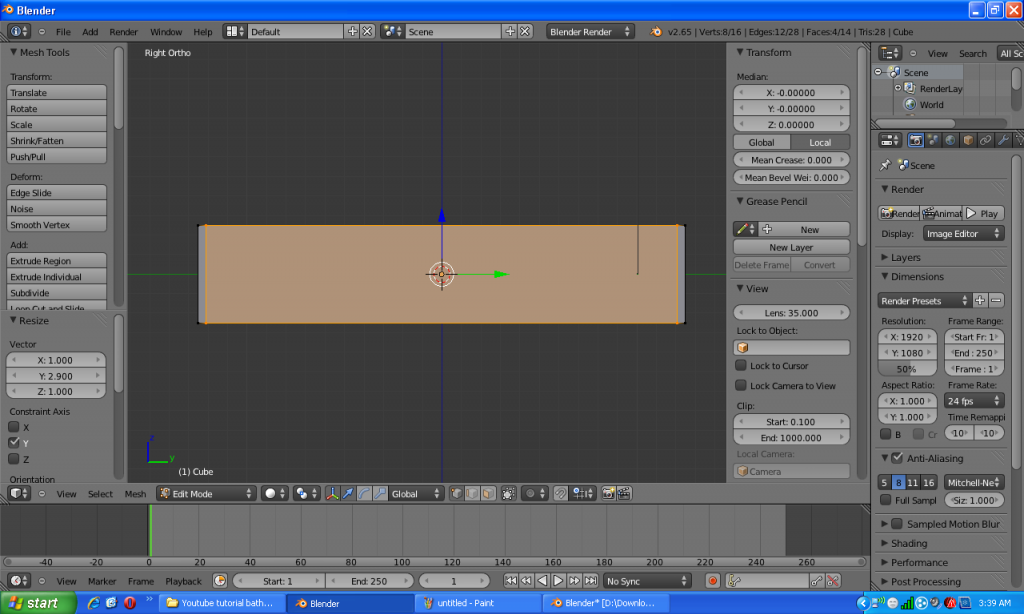
TAB into edit mode, press NUM 3 and add 2 loop cuts. Scale them 2.9 on Y.
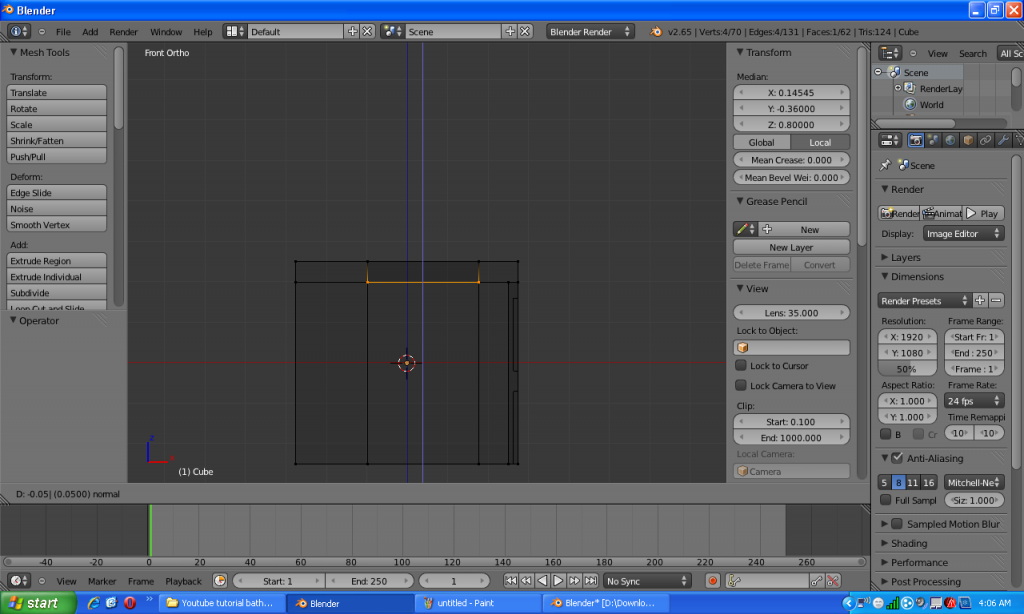
Add another loop cup horizontally and scale it 0.2 on Z.
Select the new created face. We are going to use this face to create outside borders.
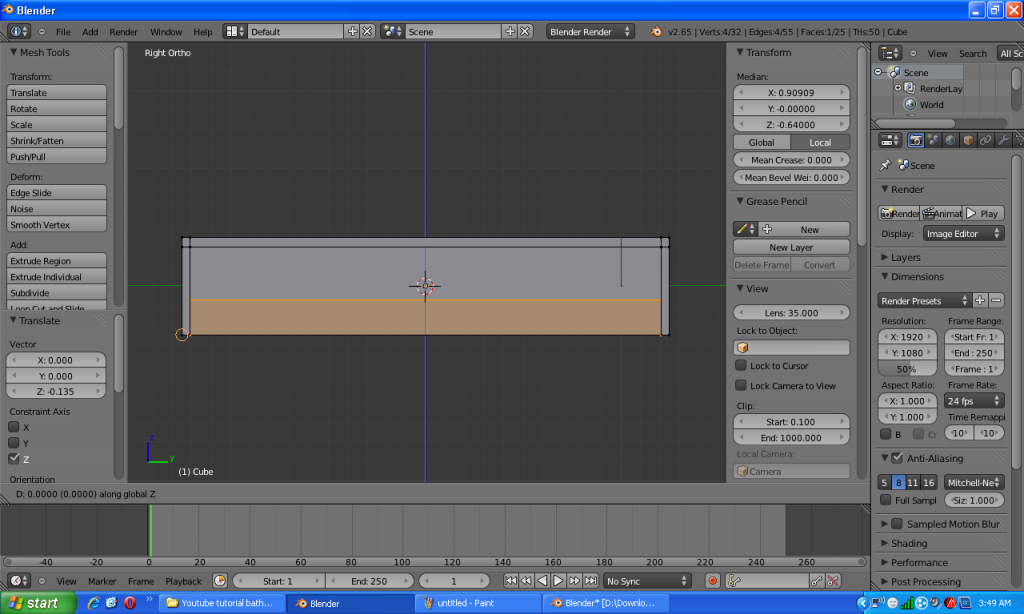
Extrude the selected face -0.025 on the default X axe. Your face should look something like this from front view.(orthographic)
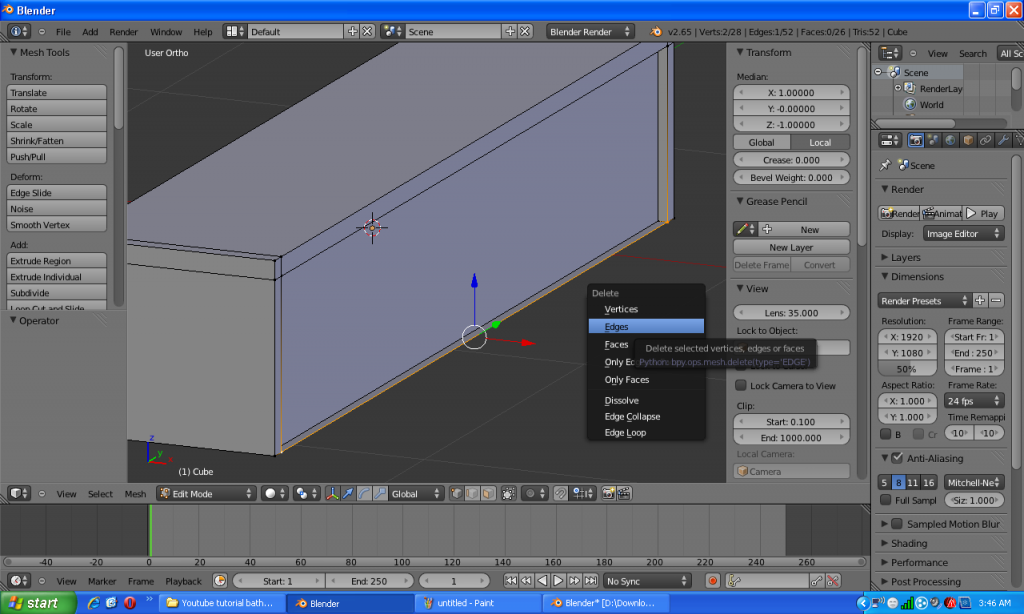
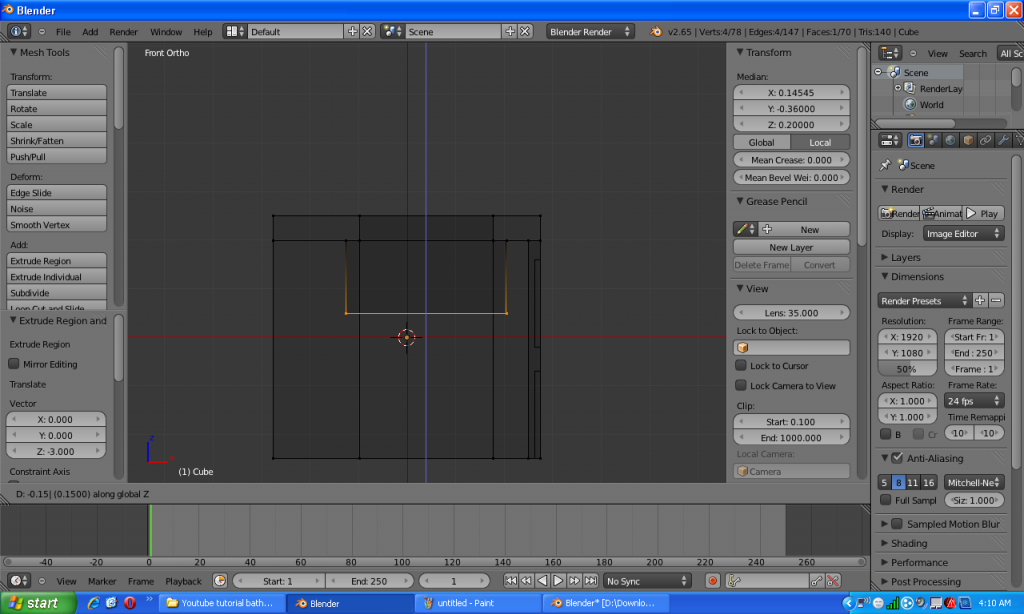
After we make the extrusion the bottom face remains so we are going to select the bottom edge and delete it, we don't need a bottom border. The whole bottom face disappear and the bottom is empty now.
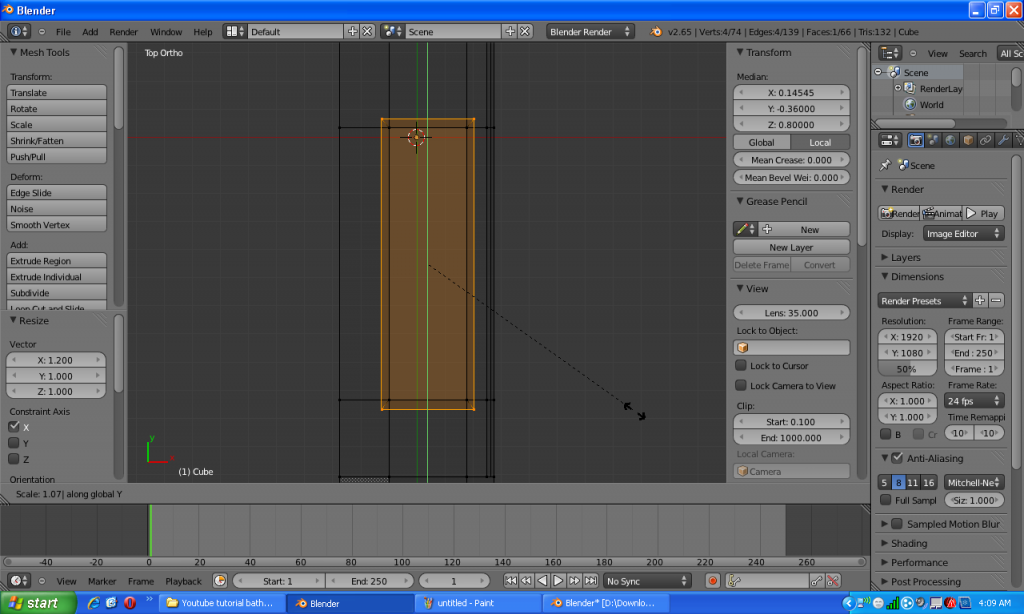
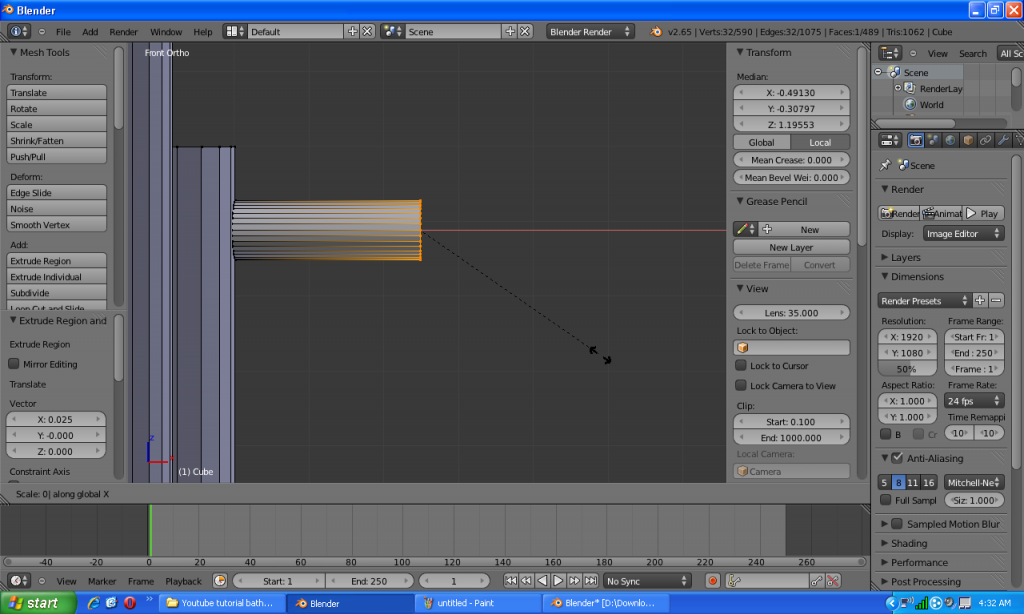
We are going to do now the front plates and for that we are going to select the new created face to make it faster.
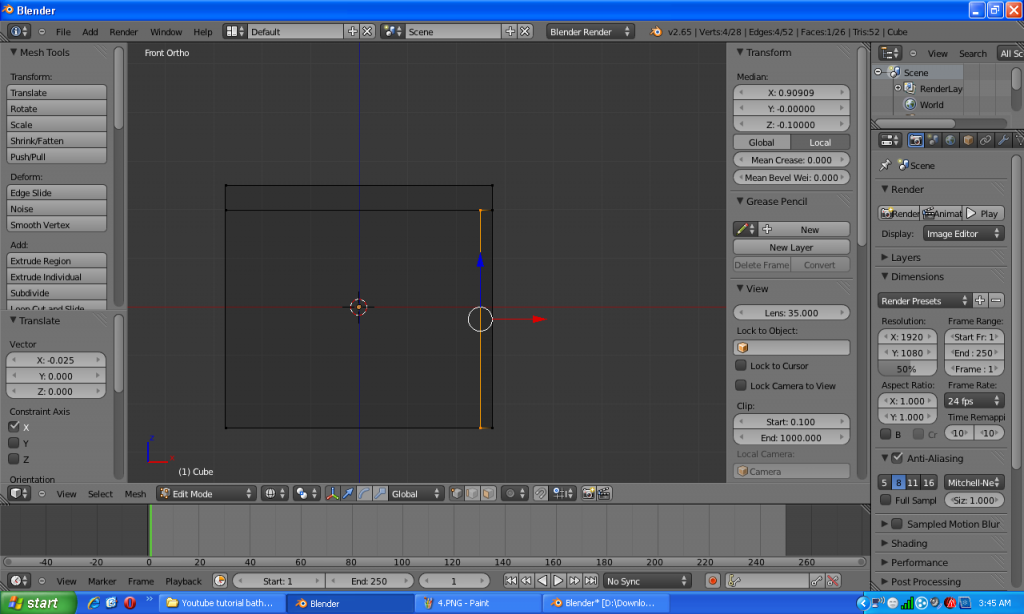
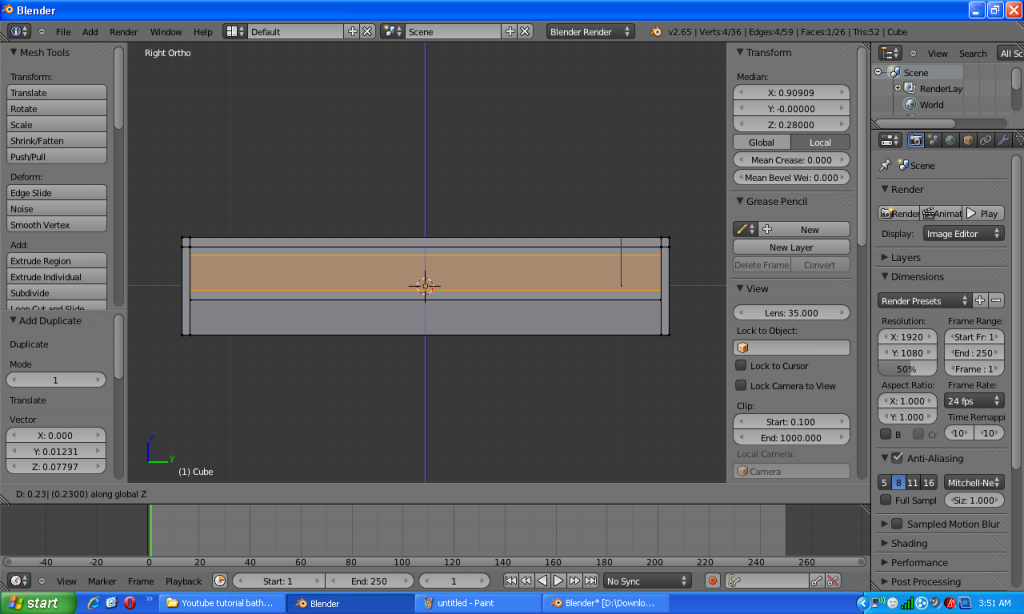
After we selected that face go to side view(NUM 3) for a better view and duplicate (SHIFT+D) those vertices.First scale(S) that new face 0.4 on Z. Then select the snap type to be vertex(CTRL+SHIFT+TAB) and we are going to snap that duplicated face to the bottom vertices. To do that grab(G) the new face on Z and hold down CTRL to snap it to a vertex.
Duplicate(SHIFT+D) that face and move(G) it 0.23 on Z.
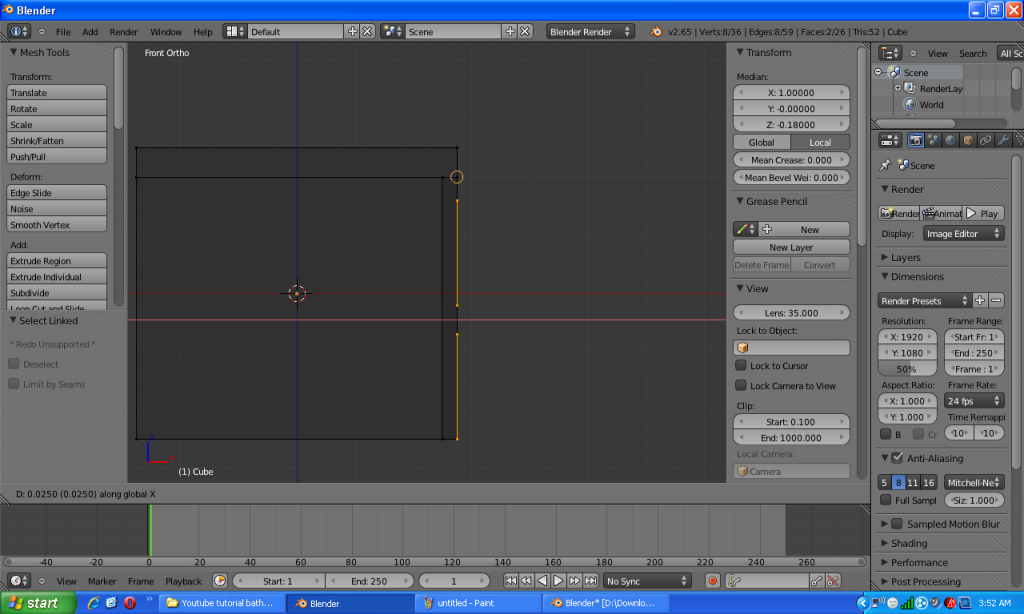
Now we need to move them to the front. Go to front view(NUM 1) and grab(G) it on X while holding CTRL to snap the new created faces to that vertex. Note: to select them faster you can hover your cursor over a vertex and press L. That will select all the linked vertices.
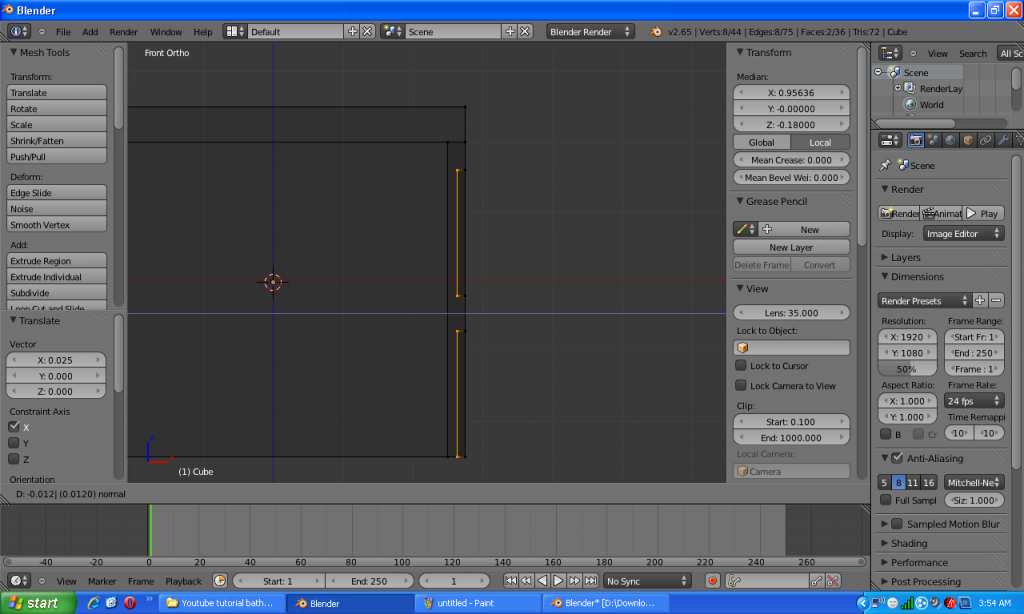
We are going to give some depth to those plates now. Extrude(E) -0.012 both of them.
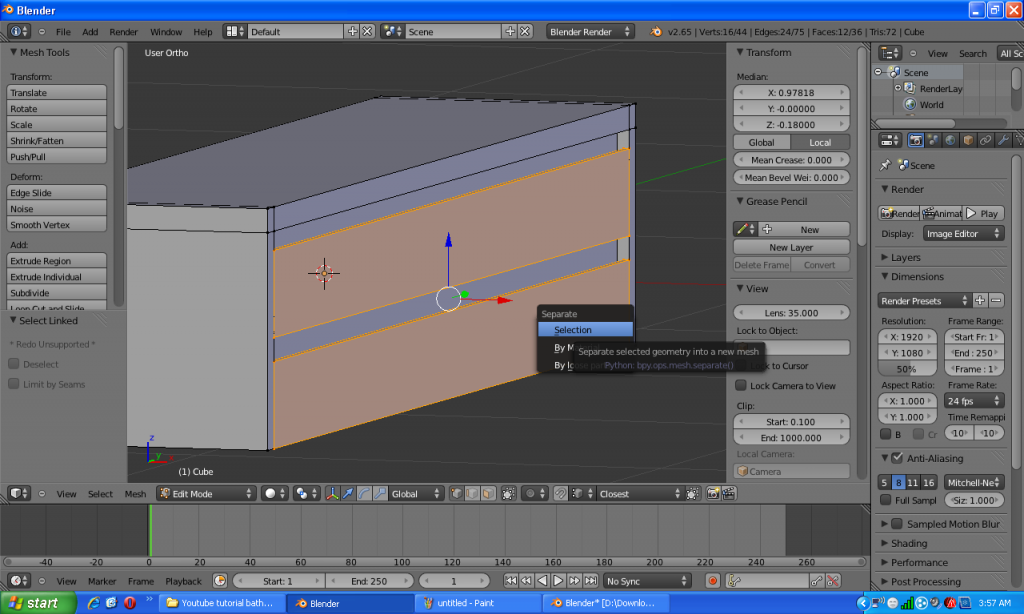
To make the modeling easier just select both plates and separate(P) them by selection so we have 2 objects now.
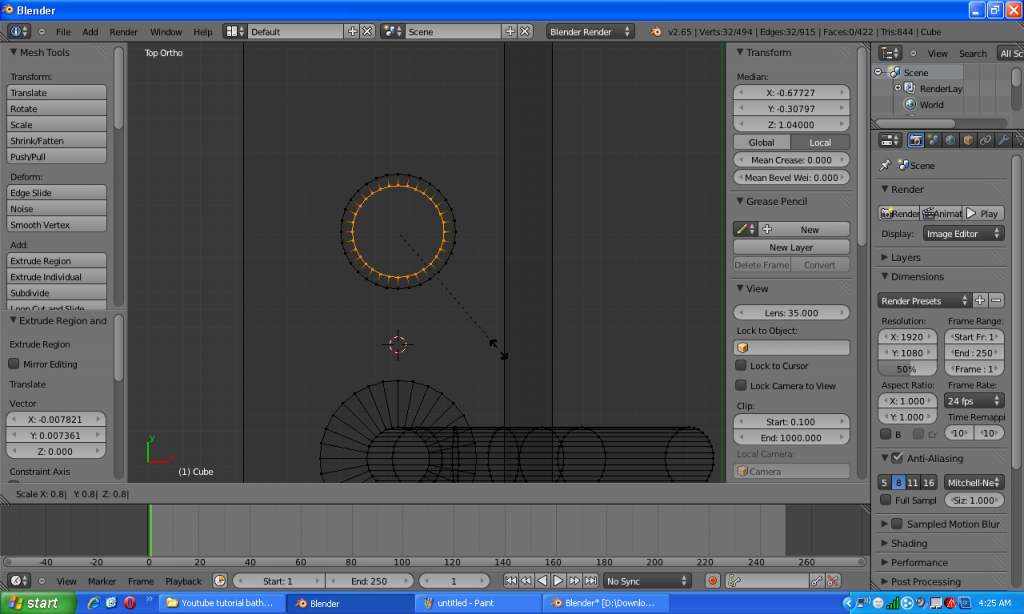
Now we will make a simple sink. Add two loop cuts(CTRL+R) and scale them 1.2 along Y.
Grab those loop cuts -0.45 along Y.
Add another 2 loop cuts(CTRL+R) like in the image bellow and scale them 1.5 along X.
Grab them 0.04 along X.
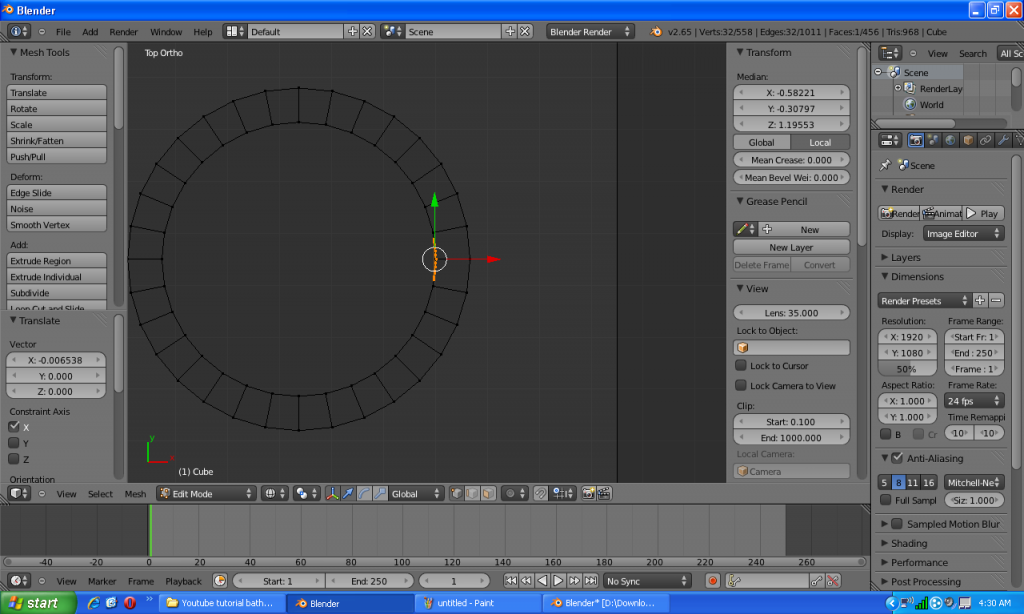
Select the shown face and we are going to extrude the sink.
Now extrude(E) -0.05 along the default normals.
Press E to extrude and right click to place the selection. Scale 1.2 along X and then 1.07 along Y.
Extrude again -0.15 and pretty much this is the sink.
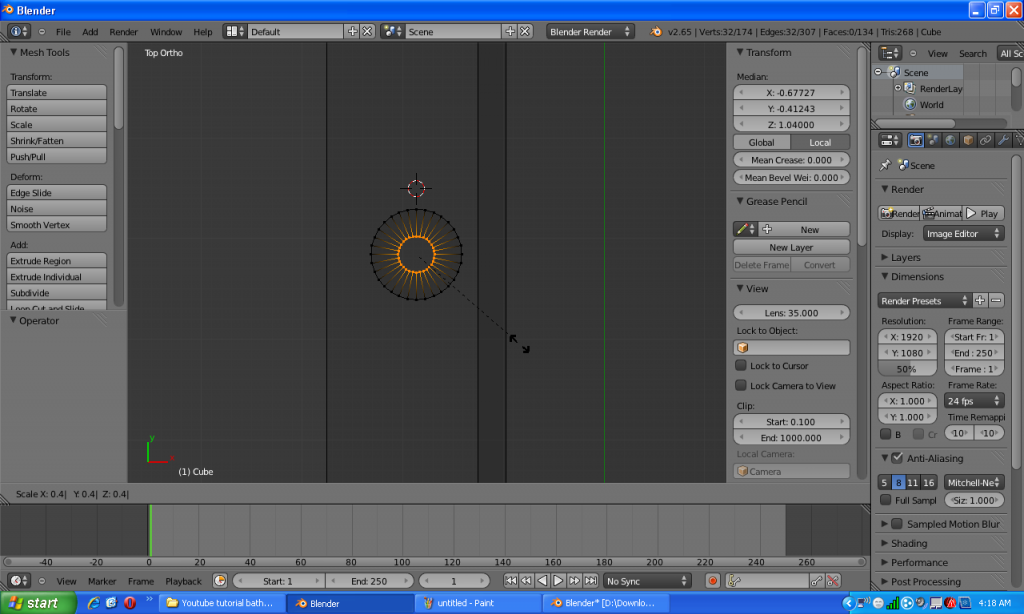
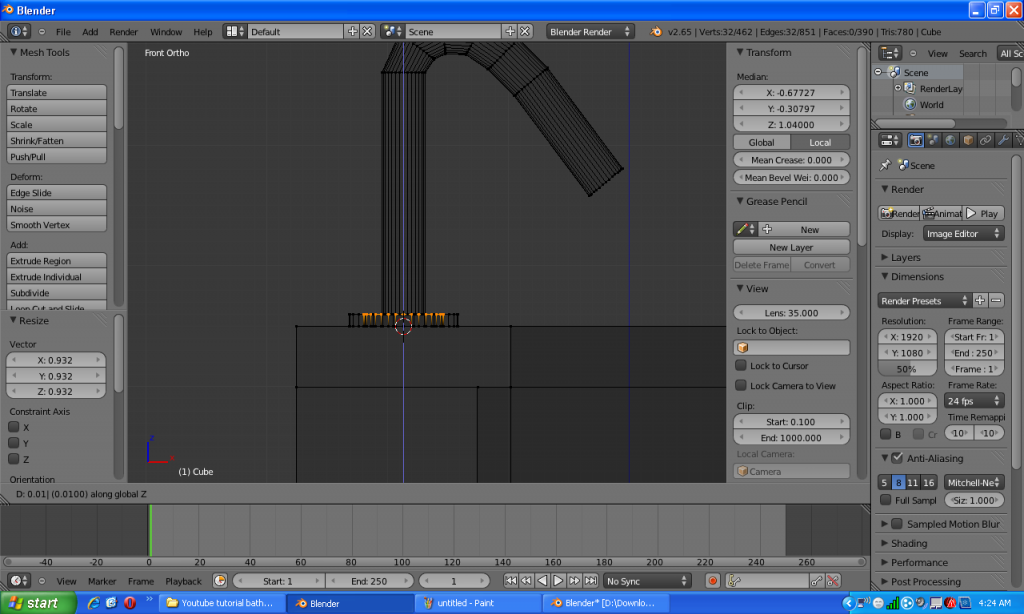
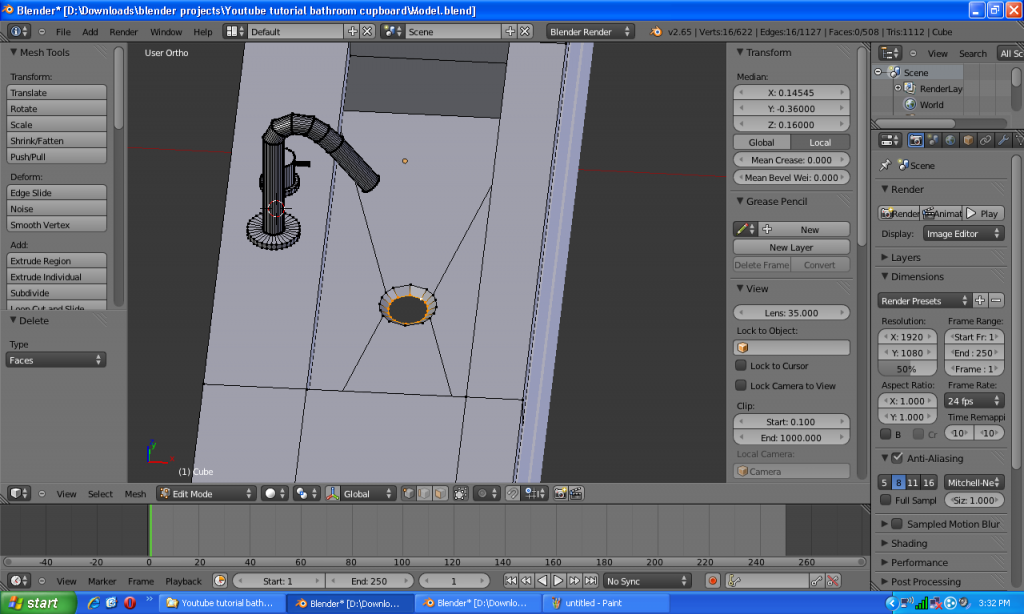
We will now do the tap. Add an empty circle, scale it down 0.045 and place it as shown in the image below.
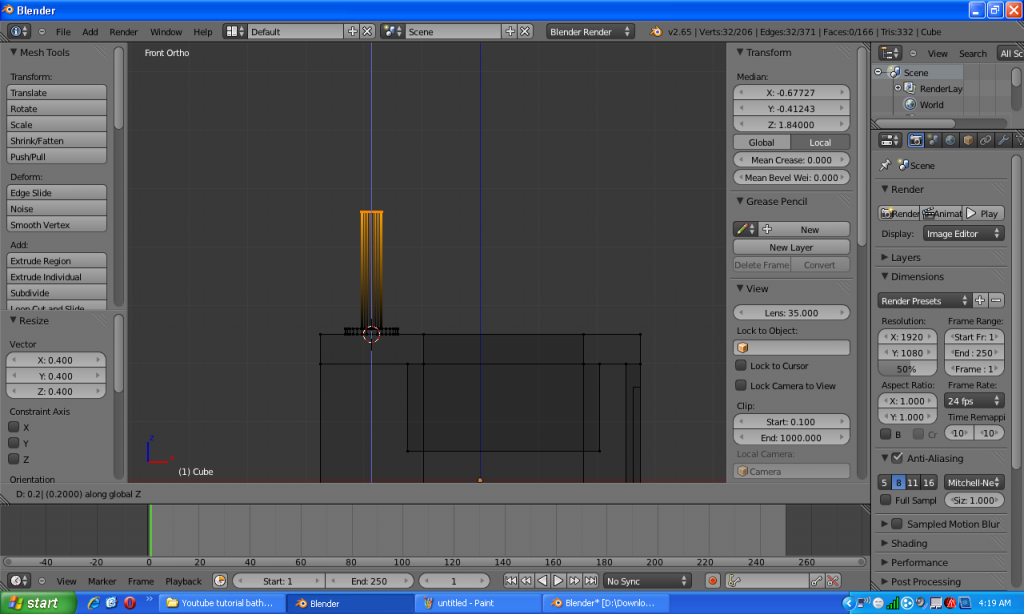
Extrude the circle 0.01 up along Z.
Extrude it again and scale it in 0.4.
Extrude up 0.2.
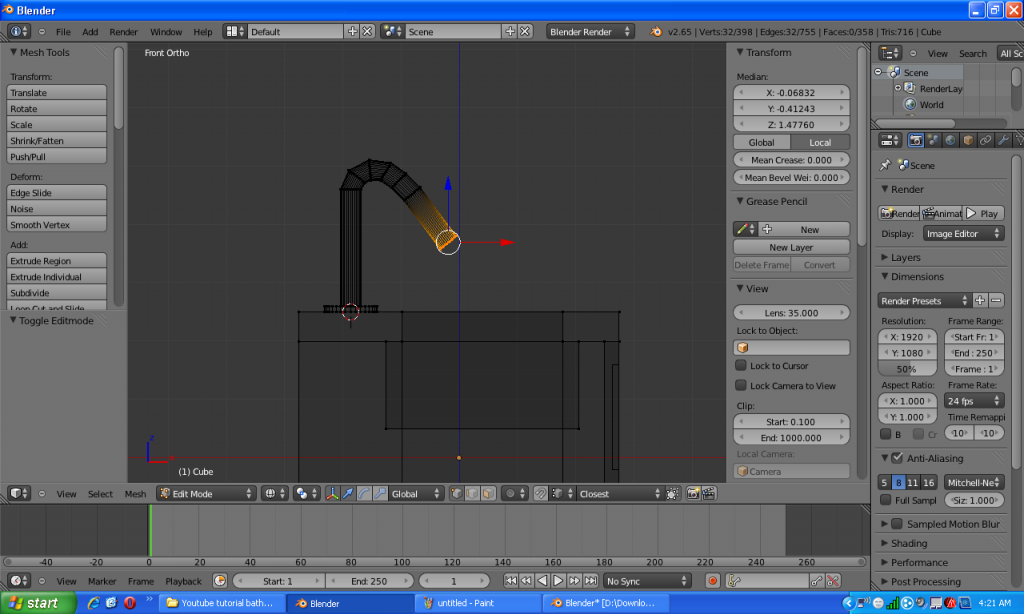
Now comes a little bit of free modeling. Just extrude that circle and rotate it to get a tap like shape.
Select the bottom circle and SHIFT+D to duplicate it. Grab it along Y as shown and scale it down just a little bit.
Extrude this one as well 0.01.
Extrude and scale down 0.8.
Extrude up 0.05 and press F to make a face on the last circle.
With that circle selected press SHIFT+D to duplicate it, rotate it 90 degrees along Y and scale it to 0.15.
Grab it and place it as it is in the image below. Note: as you can see it is a little curved to match the cylinder.
Extrude this circle 0.025 and scale 0 along X to remove the curving from this face.
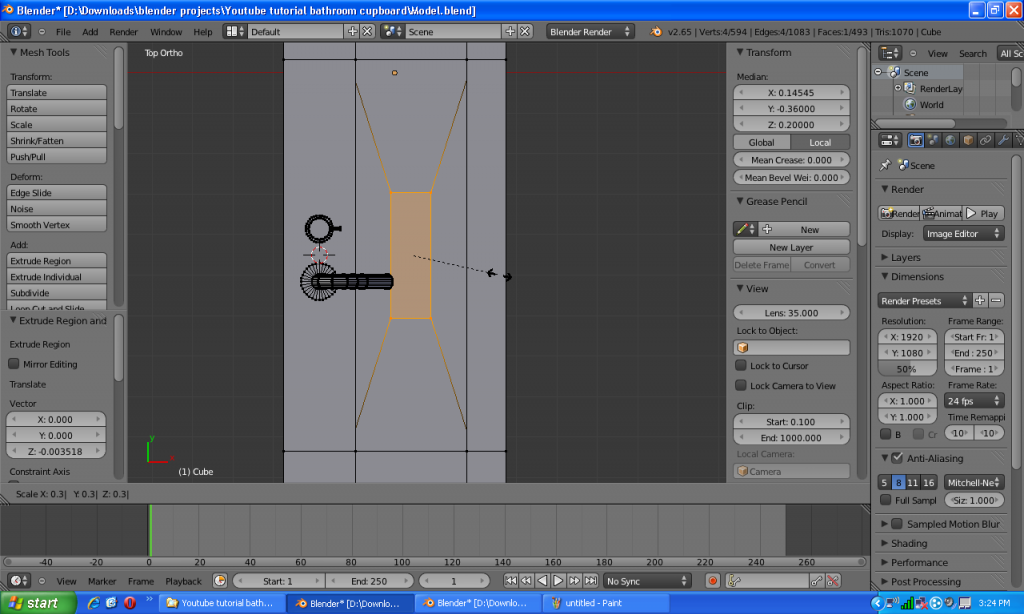
We will go back a little to the sink and we will add a hole for the water. First select the sink's bottom face.
Extrude it and scale 0.3.
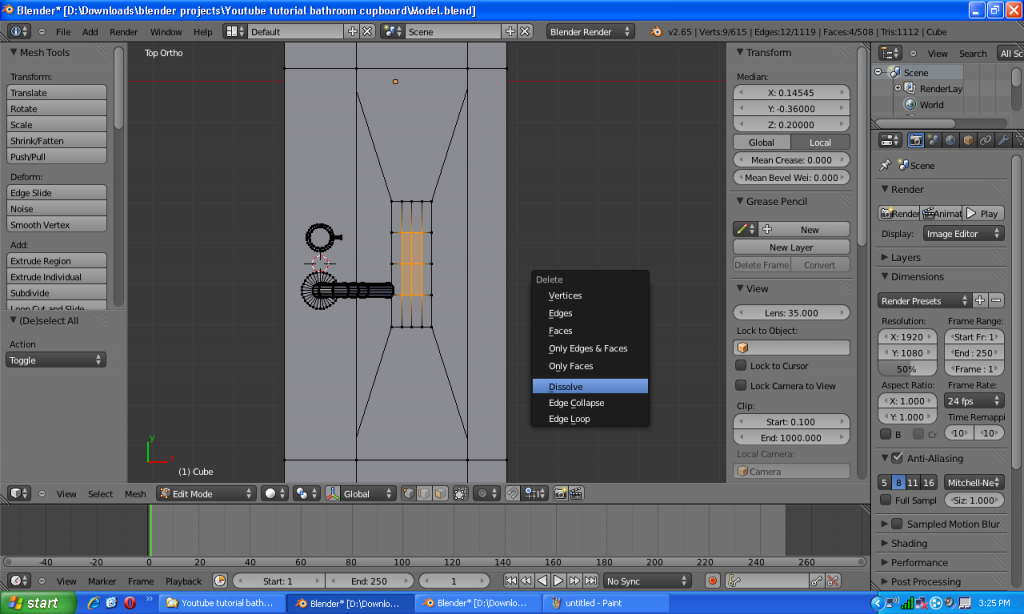
Press W and subdivide that face twice. Now select the inner vertices of that face and dissolve(X) them.
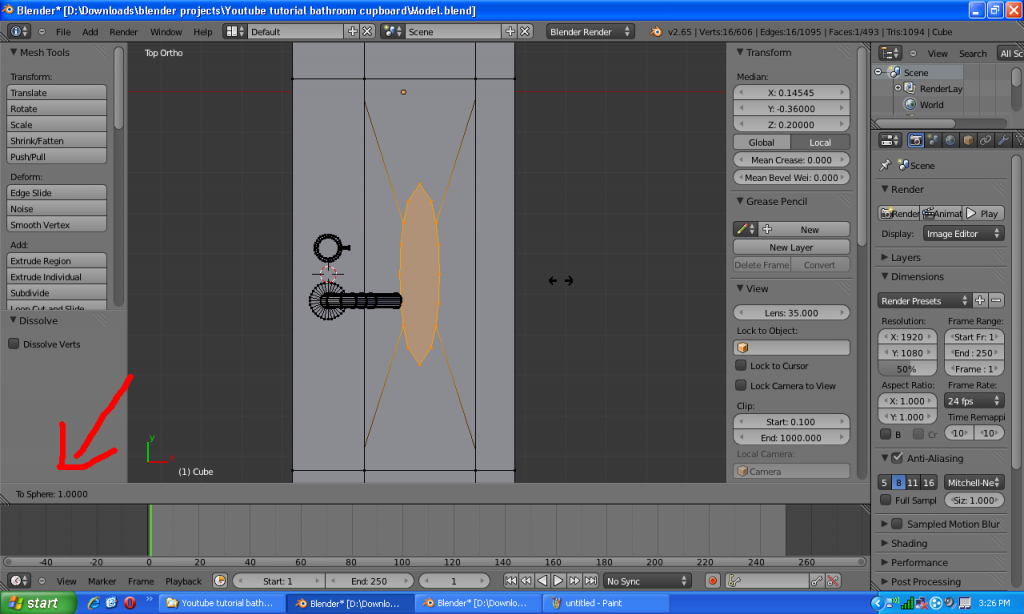
Select the outer vertices of that face and press SHIFT+ALT+S followed by 1 to sphere that square.
Scale that new circle 0.25 along Y.
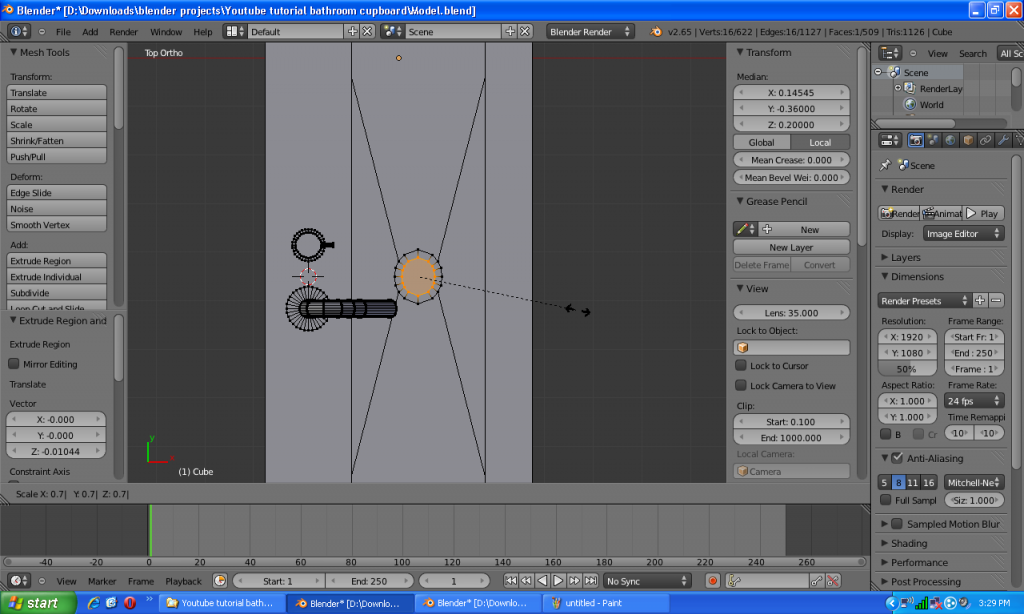
Extrude scale in 0.7.
Grab it down along Z -0.01 and delete(X) the face.
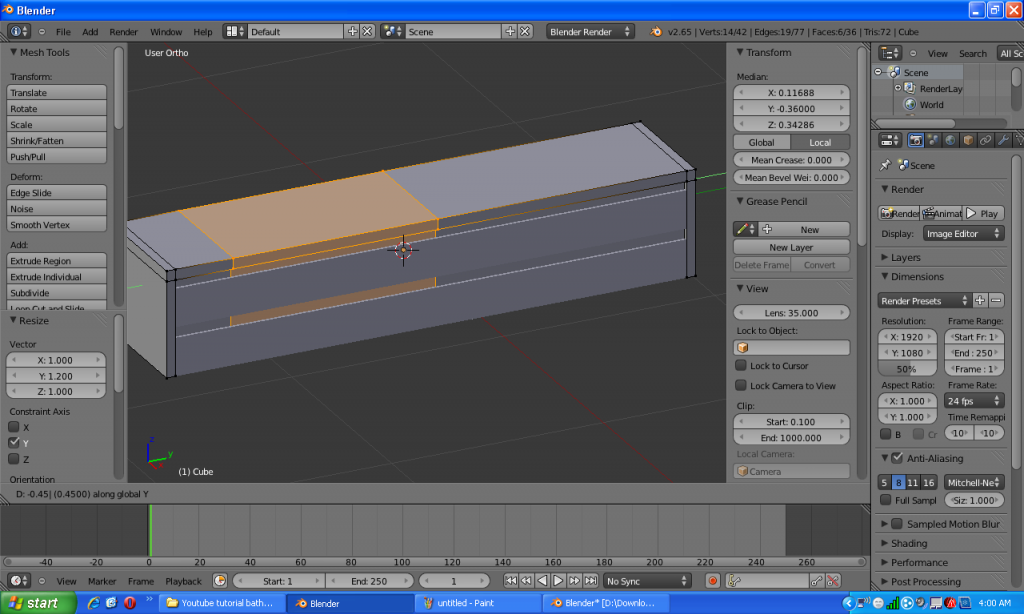
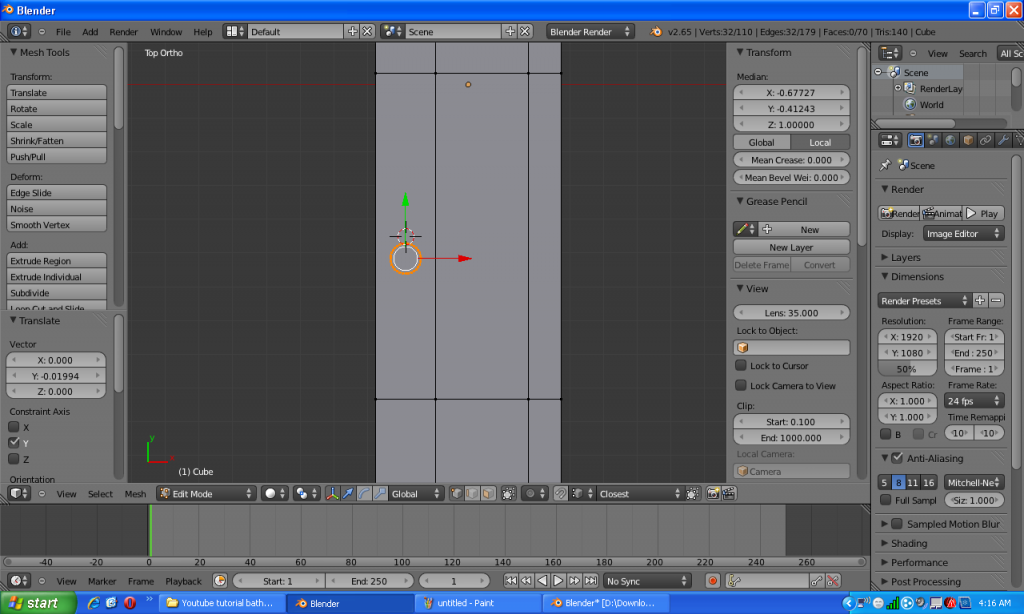
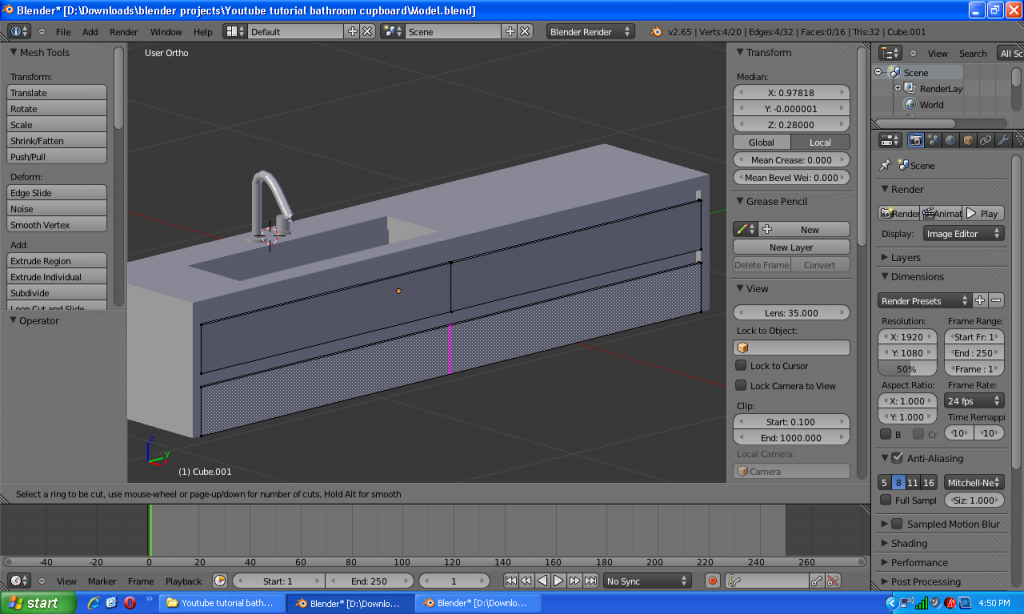
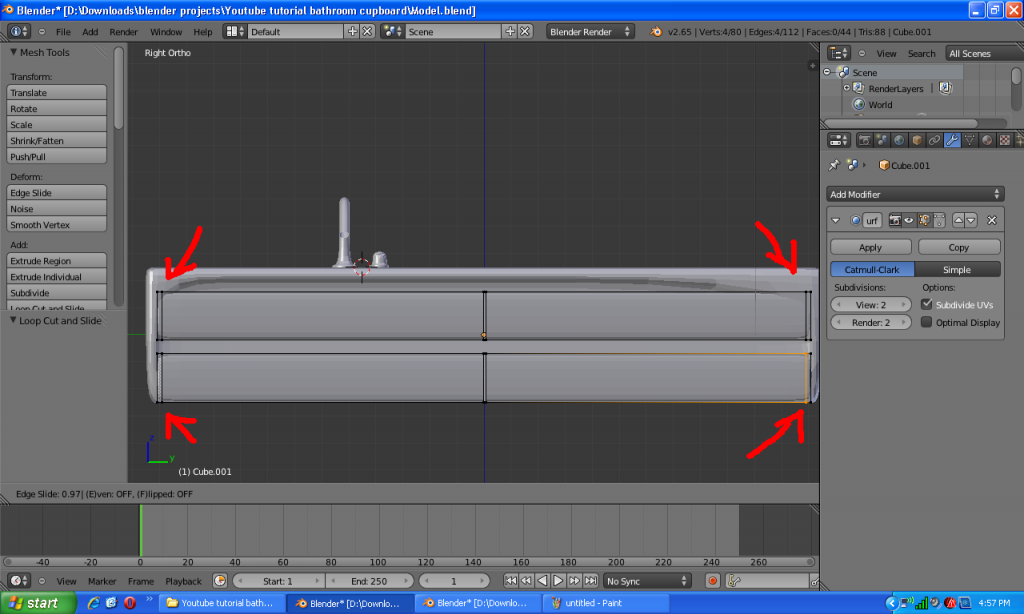
We are done with the sink and we only have a little bit to do to the front plates and apply subdivision surface and we're done. The front plates are quite long so we are going to separate them in half. TAB out of edit mode, select the plates and TAB into edit mode and add 2 loop cuts on the middle.
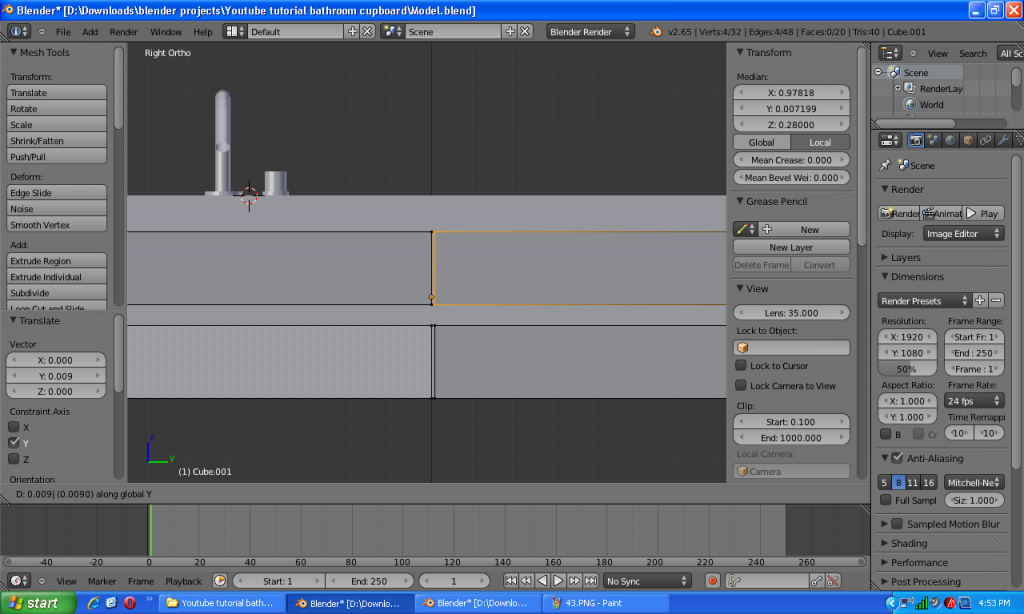
Select one loop cut and press V while holding your mouse to the right of the loop to rip it, then grab it 0.009 along Y. Do the same for the other loop.
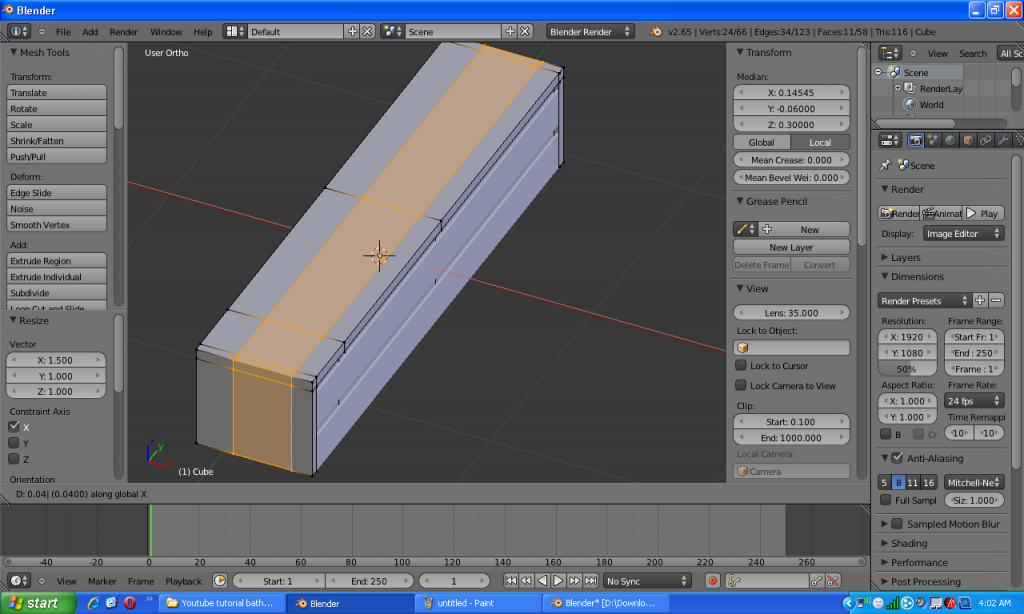
The modeling is done. I have done one more thing to make the scene easier to render. Select the tap and separate(P) it in another object. Now we have 3 objects, the front plates, the tap and the furniture or sink, however you want to call it, besides the default lamp and camera.
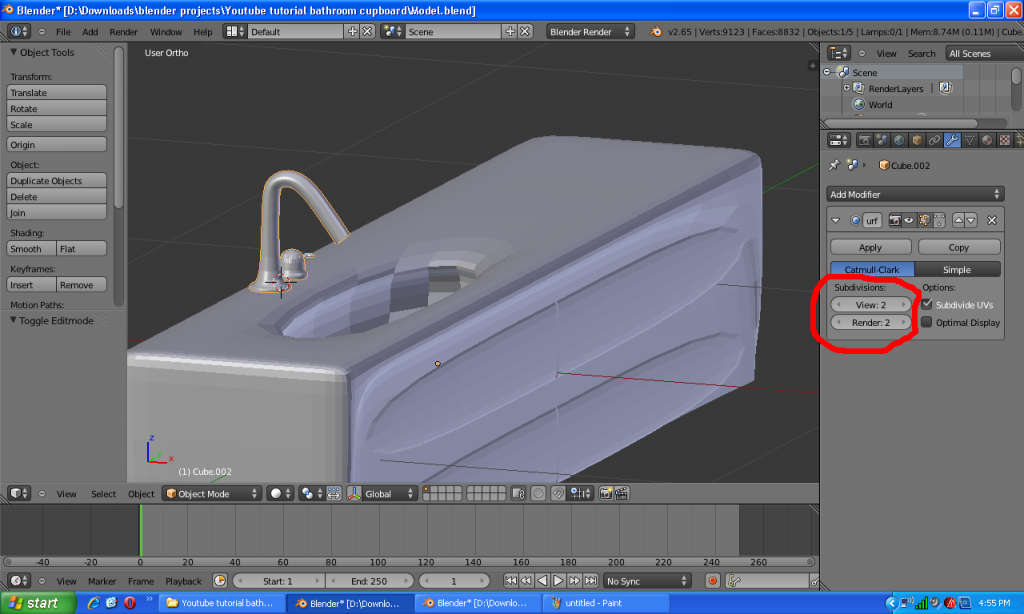
Finishing the modeling(applying subdivision surface modifier)
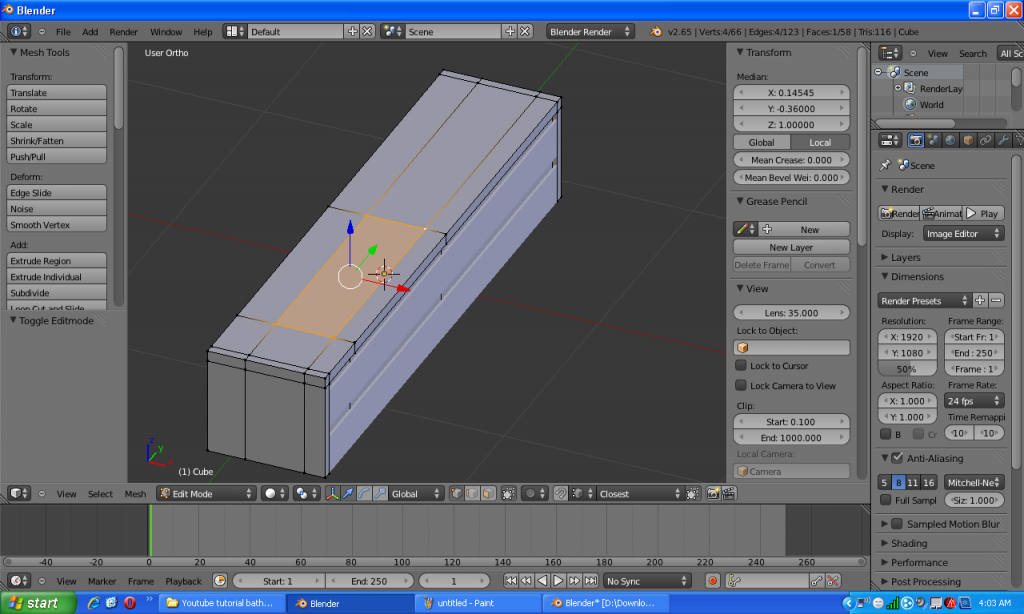
Select the front plates and add a subdivision surface modifier. The value of 2 render subdivisions are enough. If you want you can raise the view subdivisions to 2 as well to see how the final render will look. Apply modifiers to the other 2 objects as well. The modifiers must be applied for each object separately.The scene should look like this now.
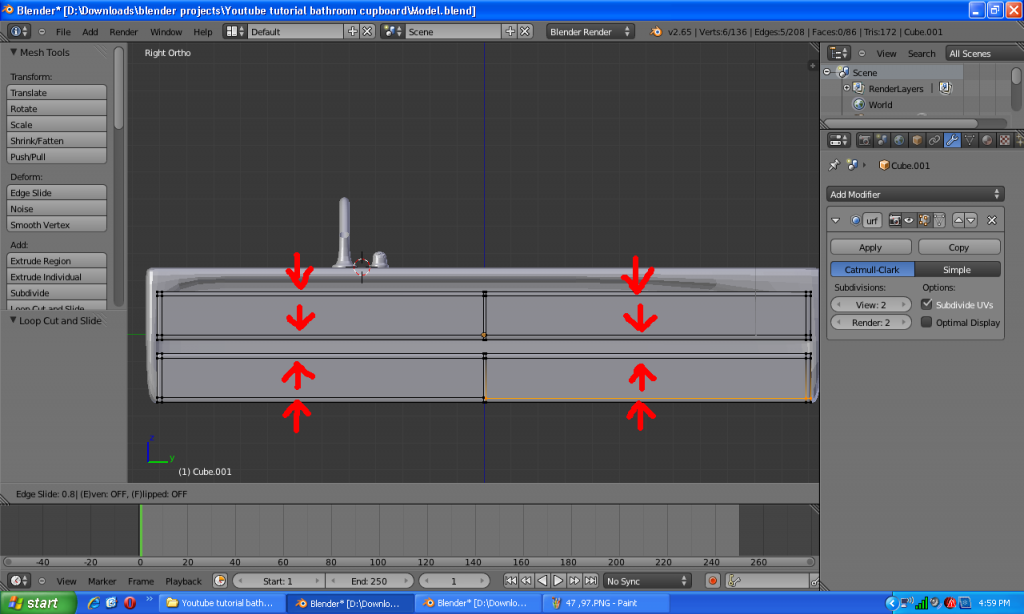
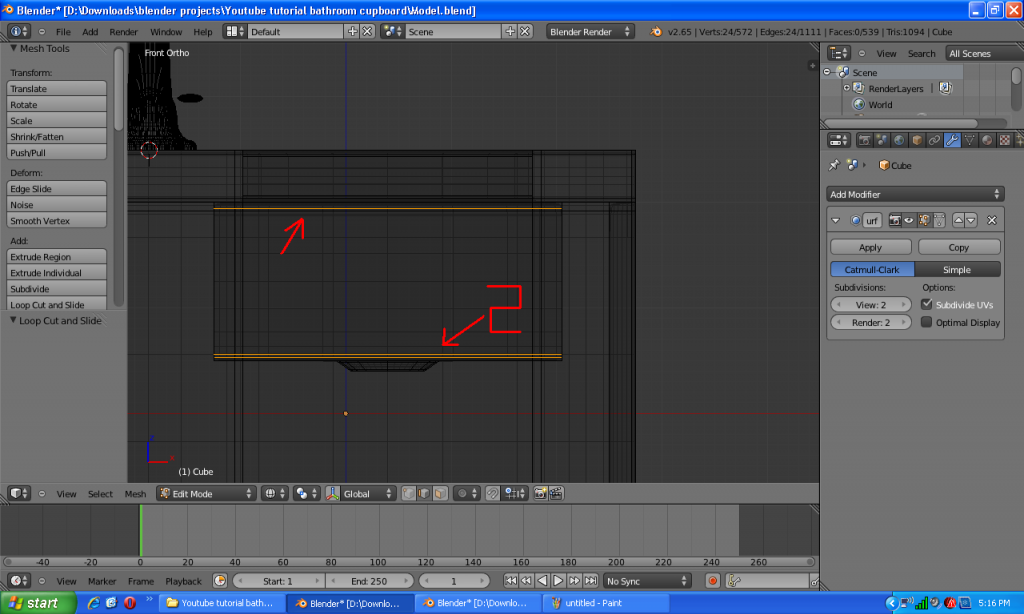
We need to fix the subdivision now by adding loop cuts(CTRL+R). Let's start with the plates.Select them and TAB into edit mode. Add 1 loop cut(CTRL+R) vertically for each plate(4 loops in total) and grab them 0.97 or -0.97 depending on the loop.
Add 2 horizontal loops(CTRL+R) for each plate(8 loops in total) and grab them 0.8 and -0.8. Note: if you add them both at once you need to scale them up instead of translating.
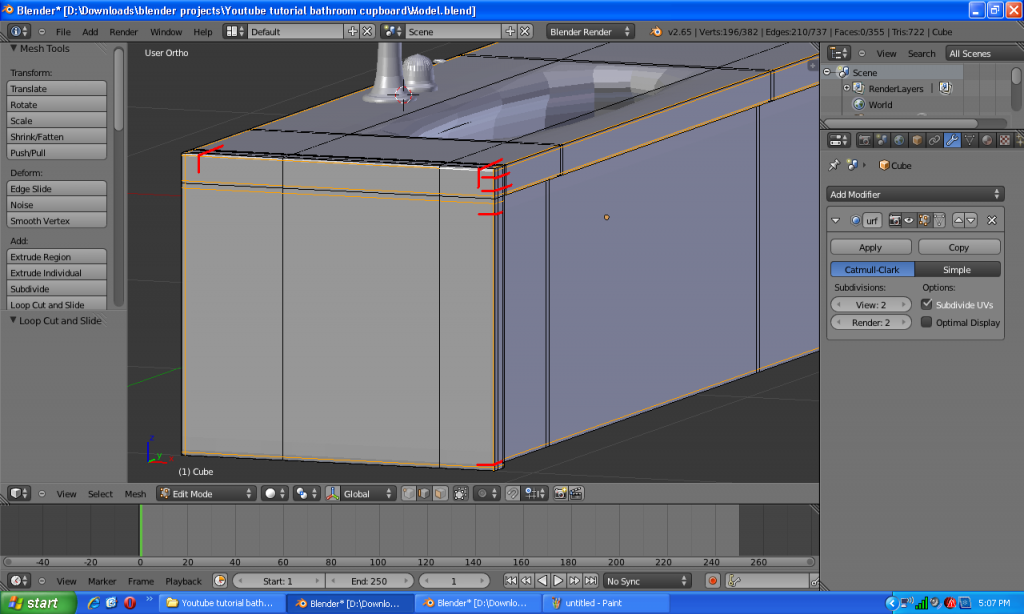
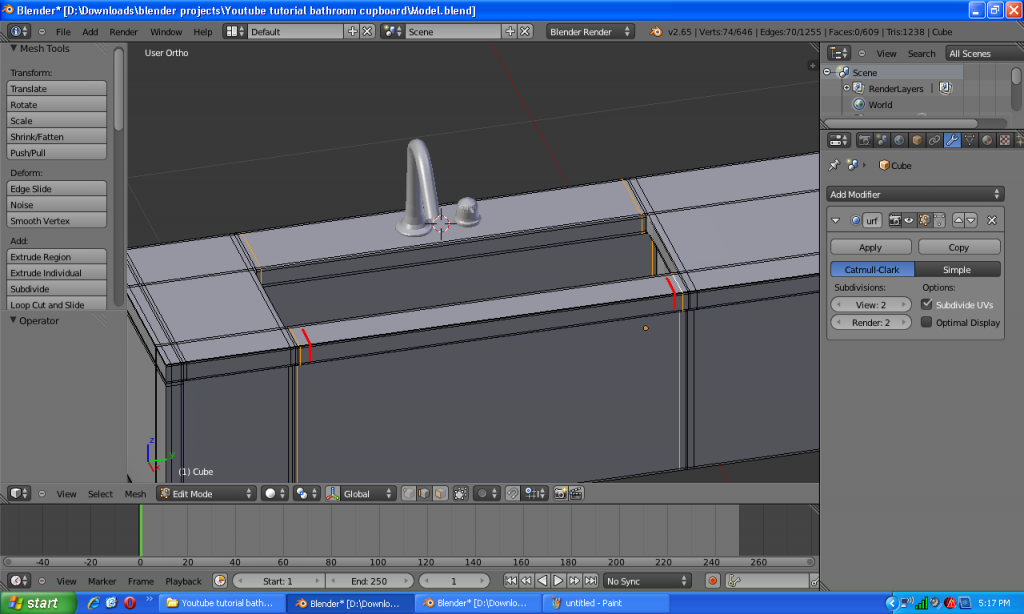
The plates are done. We will do the furniture now. Add 8 loops(CTRL+R) as shown in the image, the grabbing doesn't need to be precise, just leave a small space between the loops and the edges. We are basically trying to smooth out corners and edges now.(I've hid(H) the plates to have a better view)
Add another 6 loop cuts(CTRL+R) to smooth the other edges, 2 vertically for each corner and 4 horizontally for each horizontal edge.
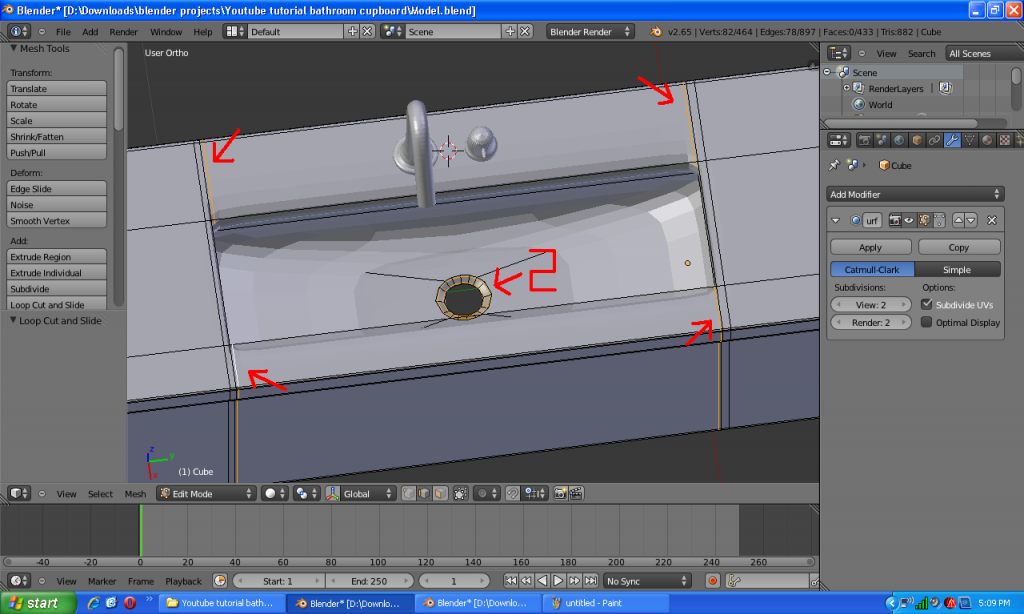
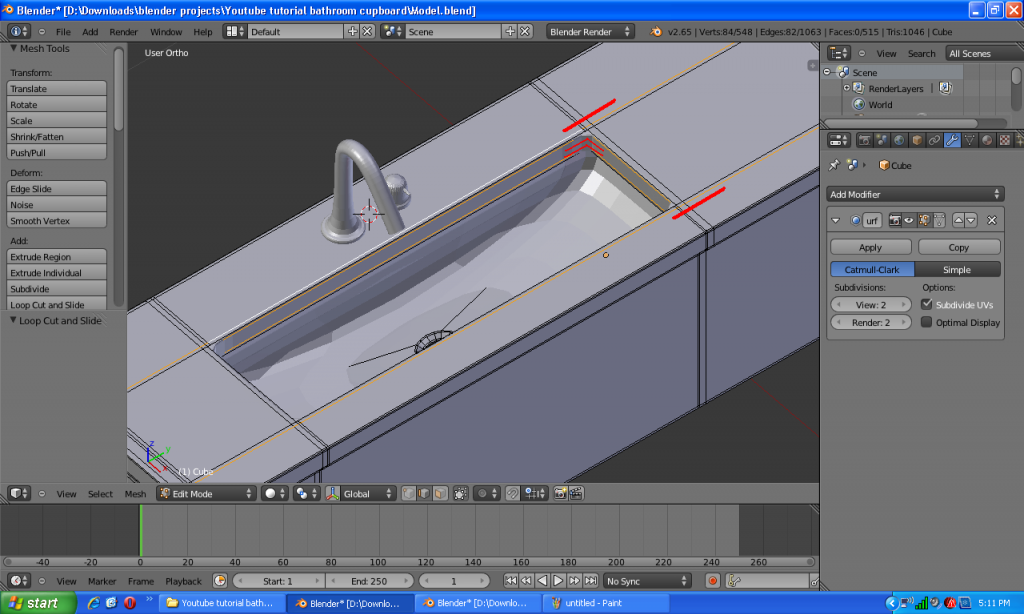
Add 4 loop cuts(CTRL+R) to smooth the sink and 2 loop cuts to smooth the sink hole.
Add 4 more loops(CTRL+R) for the sink as shown below.
We also need loops on the interior of the sink. One loop for the top and 2 for the bottom.
We need another 4 loop cuts(CTRL+R) for the sink and this object is done.
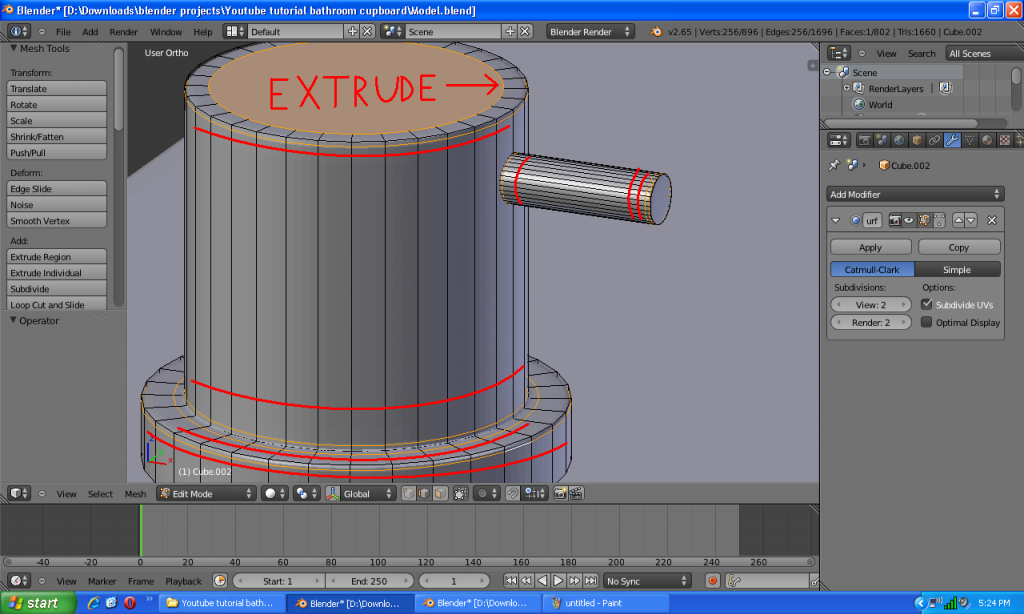
We will continue with the tap now. This one is easy. Add 4 loop cuts(CTRL+R) as shown below and the tube is done.
Add 4 loops for the main piece and 3 for the small cylinder. The circle on the top can't be added with a loop cut, you need to select the top circle, extrude(E) it and scale it down. The loop cuts were added here to round up the corners.
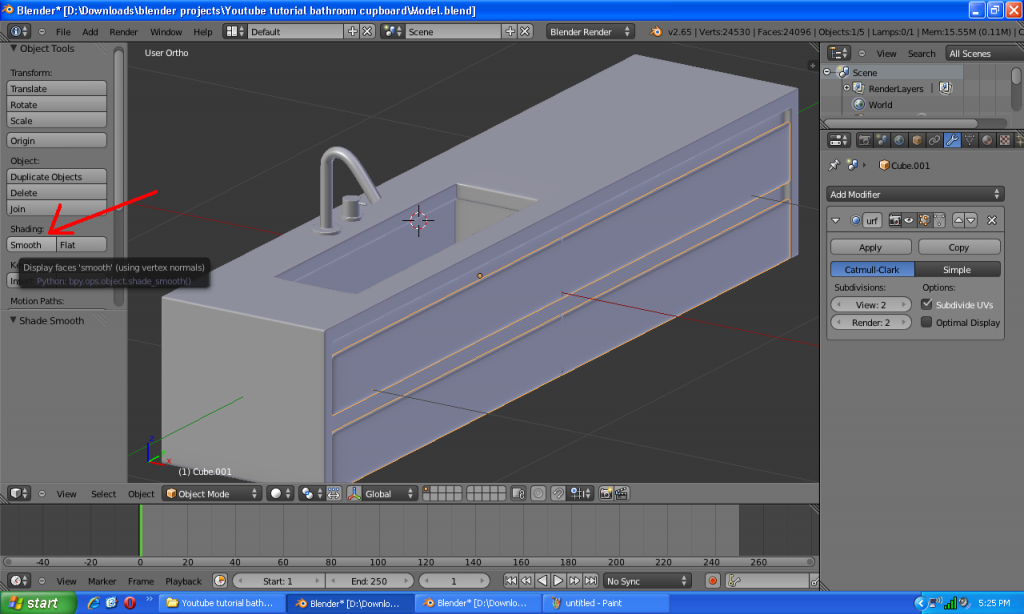
One last action and the modeling is finished. Select one object at a time(be sure you are in object mode) and select smooth shading. If you've hidden the plates press ALT+H to unhide all.
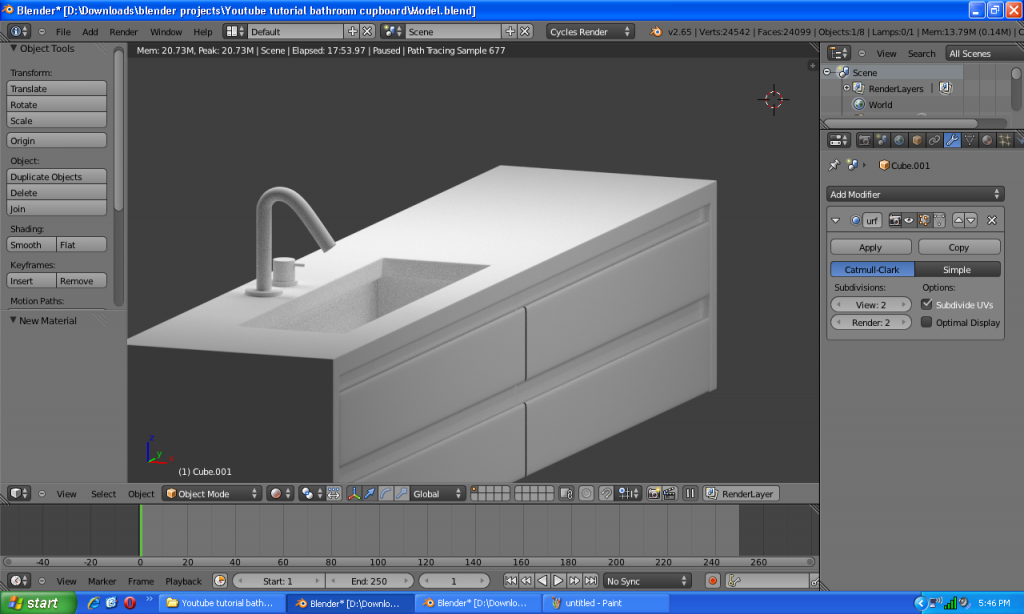
We are finished. This is the final model. Hope you like it and leave a comment below. Perhaps you can do something nice with this tutorial. Show me your results and what you have learned reading this tutorial.
Leave a comment below! :)


thank you for this :D
ReplyDeletethe tutorial was very clear and easy to comprehend !
Thank you. I know that sometimes tutorials can be hard to follow so I try to make mine easy to understand.
DeleteWith a robust surface unit, the sink is actually incorporated with the ledge. There are numerous points of interest to this outline, which is the reason more property holders are performing Bathroom Furniture rebuilding employments on their kitchens and bathrooms to fix them.
ReplyDeleteBefore we dig further into the requirement for washroom furniture, we should know what these are and for what reason do we use them. Just a sort of furniture is intended to store washroom basics. What you get from it are your washroom fundamental things you really want consistently stays at simple access at whatever point you want them. Get More Information Bathroom Furniture
ReplyDelete